


Introduction
In this tutorial, we will go over the process of retopologizing a sculpt in ZBrush. This tutorial assumes that you have a basic understanding of how ZBrush works and basic 3D modeling knowledges (3DS Max, Maya or equivalent). This tutorial is intended for ZBrush version 3.1 or above.
"Retopology"?
We are going to use Z-Spheres and plot verticies on the surface of our detailed sculpt in order to create a much lower resolution model that can be used as a base mesh for video games. The advantage of retopologizing your geometry in ZBrush is that the mesh's silhouette will follow the high poly sculpt very accurately, making it an ideal candidate for map baking.
Preparations
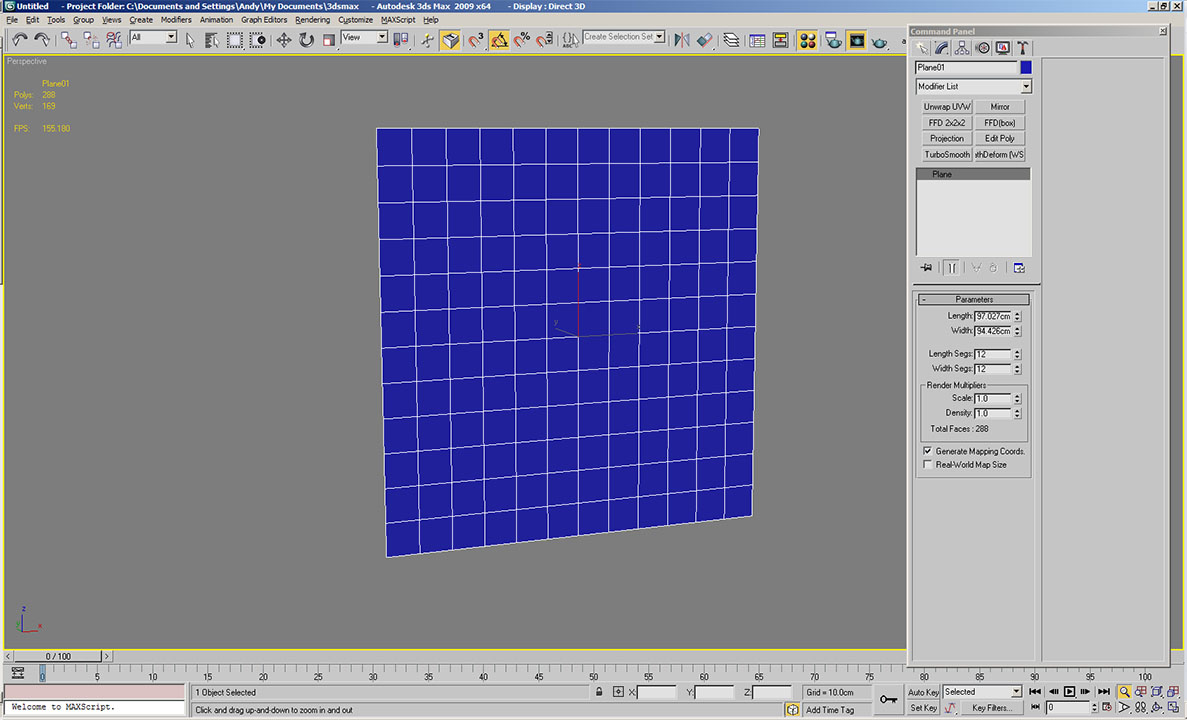
This is a plane with some subdivisions that I've prepared in 3DS Max. To export your mesh into ZBrush, go to File/Export Selected and choose your export type as *.obj (Maya users will need to go to File/Export)

Once you have imported your mesh into ZBrush, subdivide it further. You can find the subdivide option under Geometry (Hotkey: Ctrl+D).
(Note: since I am working with a plane, I have turned off smooth modifier)
Once you have subdivided your mesh at a comfortable level, you may begin sculpting.

For the purpose of this demonstration I did a quick sculpt of something that resembles a rocky shape. Of course, your sculpt is gonna be 10 times more badass than mine. But for now, let's stick to something simple.
(Note: the material I have used in this demonstration is md_antique_bronze_1, you can download more materials at http://www.pixologic.com/zbrush/downloadcenter/library/
This concludes the introduction and preparation part of the tutorial.
Page
Copyright 2004-2019 Andy Xiao. All Rights Reserved.